How To Create AWS Route53 Public Hosted Zone
Categories:
Overview
In this tutorial we learn how to create AWS Route53 Public Hosted Zone. We will create the hosted zone from AWS Console.
Create Route53 Public Hosted Zone
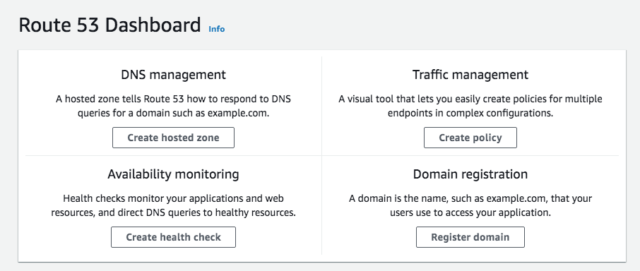
- Open AWS Route 53 service from AWS Console homepage. You can use the search bar or select from the service list

- Choose Create hosted zone
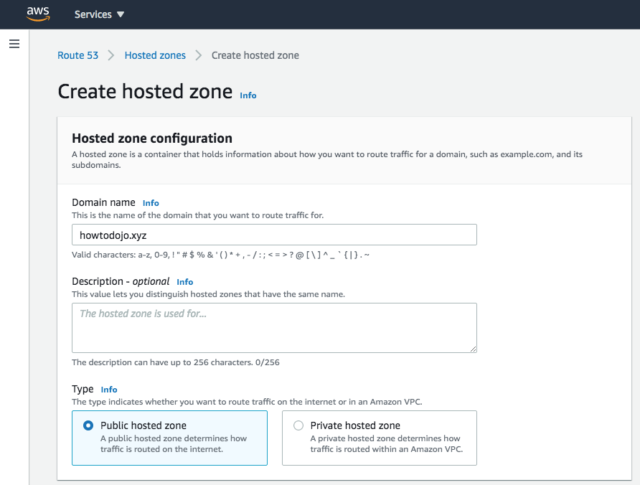
- In this step we will enter the domain that we will use for the new zone. Optionally you can input description for the zone. For the Type, Choose Public hosted zone.
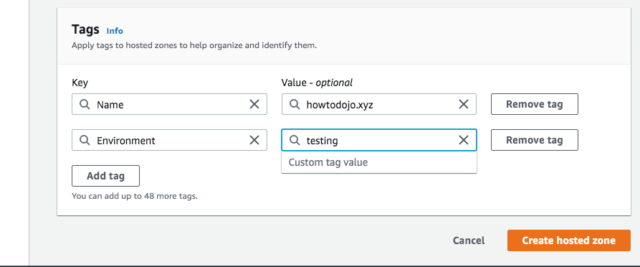
On the next page we can enter tags. There are several potential use case for this tags. The first one is for cost allocation of this hosted zone. Another use case is to grant limited access to the zone to an IAM user or role.
Click Create Hosted Zone to finish the process.
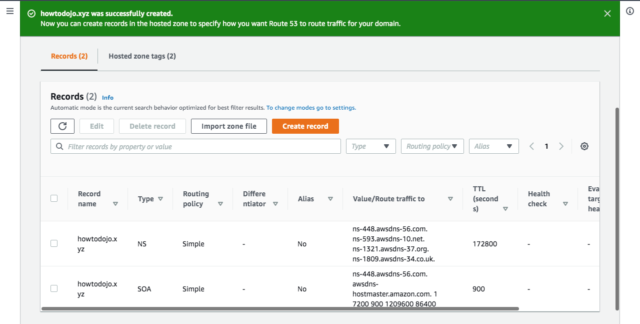
The new route 53 public hosted zone created.
Get the values of the NS record. We will need them to set the glue record on the registrar.
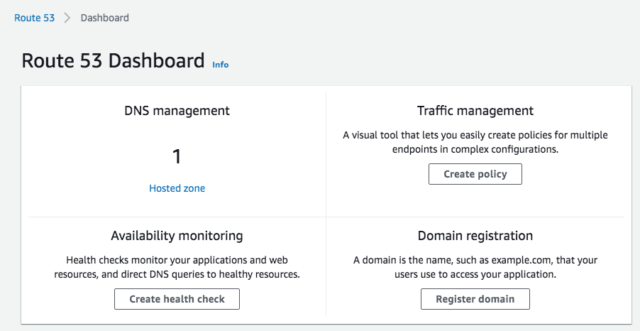
If we back to Route 53 dashboard it will show that we have 1 hosted zone.
Set Name Servers
In this tutorial, I use a domain that I registered in Namecheap, so I will set the Name Server (NS) from Namecheap.
You don’t have to transfer your domain from your current registrar to route53 domain service to be able to create Route 53 Public Hosted Zone.
To set Route 53 NS in Namecheap we can use the steps below:
- Open Namecheap. Select the domain which I’ll delegate to Route 53 Public Hosted Zone. Choose Manage

On NAMESERVERS, choose Custom DNS.

Enter the value of NS record of our newly created Public Hosted Zone. Click the green checkmark to apply

Summary
In this tutorial we learn how to create AWS Route53 Public Hosted Zone from AWS console. We also learn setting the name server on the registrar to use the NS servers of the public zone that we just created. Until next time.