How to Install MySQL 5.5 on Ubuntu 14.04
Categories:
Overview
MySQL is one of the most used open source database especially for web application. MySQL 5.5 is a pretty old version of MySQL but if your application still needs to use this version of MySQL you can follow this tutorial.
In this tutorial we’ll learn how to install MySQL 5.5 in Ubuntu 14.04. We’ll also secure and configure our MySQL server installation.
Prerquisite
This tutorial assume you have clean install of Ubuntu Server 14.04. You can use any flavor of Ubuntu 14.04 like Ubuntu Desktop, kubuntu, xubuntu etc to follow this tutorial.
If you install MySQL 5.5 on existing production server you might need to consult with your system administrator.
Install MySQL 5.5
Before we install MySQL Server 5.5 we’ll update our system to latest update
sudo apt-get update
sudo apt-get upgrade
Install MySQL server 5.5. mysql-server package on Ubuntu 14.04 will install MySQL 5.5
sudo apt-get install mysql-server
apt will list all packages that will be installed including dependencies. Press Y to continue installation.
Reading package lists... Done
Building dependency tree
Reading state information... Done
The following extra packages will be installed:
  libaio1 libdbd-mysql-perl libdbi-perl libhtml-template-perl libmysqlclient18
  libterm-readkey-perl mysql-client-5.5 mysql-client-core-5.5 mysql-common
  mysql-server-5.5 mysql-server-core-5.5
Suggested packages:
  libclone-perl libmldbm-perl libnet-daemon-perl libplrpc-perl
  libsql-statement-perl libipc-sharedcache-perl tinyca mailx
The following NEW packages will be installed:
  libaio1 libdbd-mysql-perl libdbi-perl libhtml-template-perl libmysqlclient18
  libterm-readkey-perl mysql-client-5.5 mysql-client-core-5.5 mysql-common
  mysql-server mysql-server-5.5 mysql-server-core-5.5
0 upgraded, 12 newly installed, 0 to remove and 0 not upgraded.
Need to get 9257 kB of archives.
After this operation, 97.1 MB of additional disk space will be used.
Do you want to continue? [Y/n] Y
MySQL Server 5.5 installation process will run. It will prompt for root password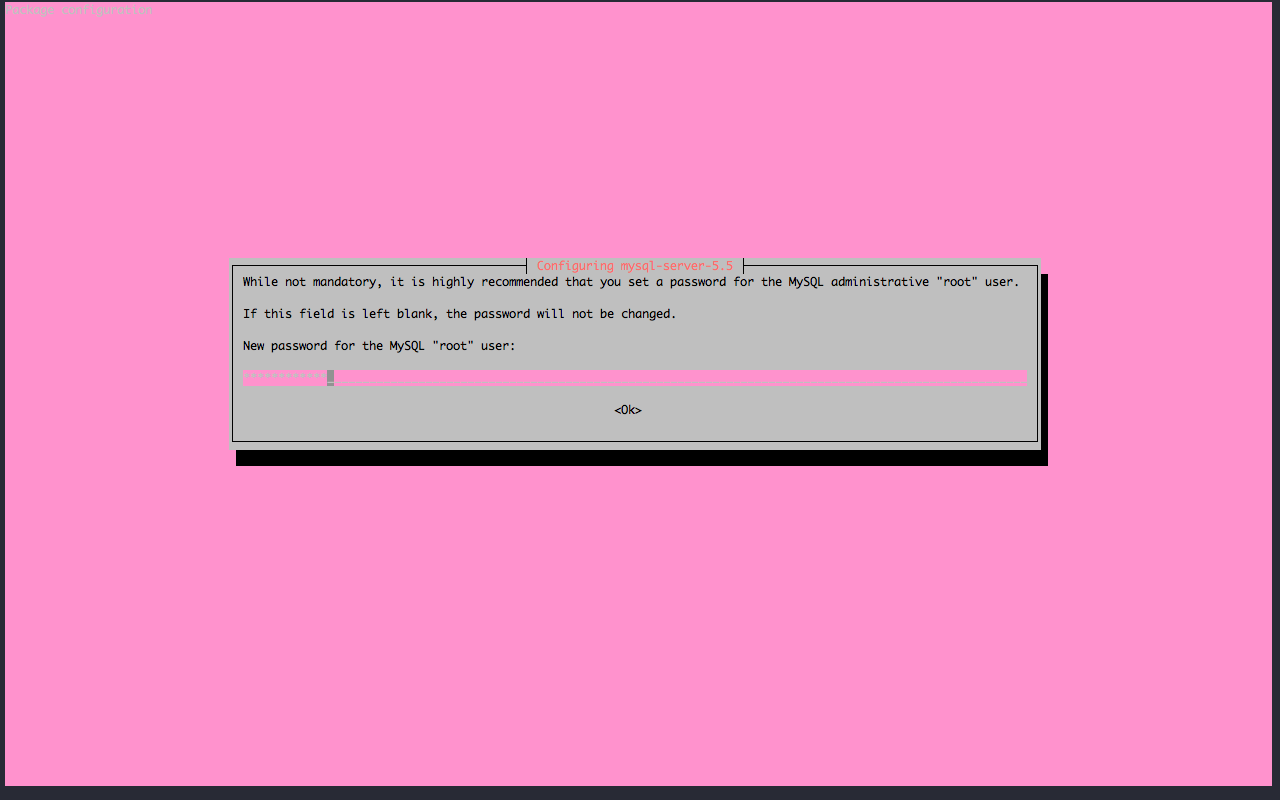
And also confirmation for MySQL root password.

Please note that MySQL root user is different with Linux / system root user. Now MySQL Server 5.5 installed on our server.
Managing MySQL Server Service
To manage MySQL service we can use service command
To check mysql service status we can use command below:
sudo service mysql status
To start mysql service we can use command below:
sudo service mysql start
To stop mysql service we can use command below:
sudo service mysql stop
We can also use ps command to check whether mysqld process is running or not
sudo ps aux | grep -m1 mysqld
mysql     6301  0.0  8.9 623948 45040 ?        Ssl  03:59   0:02 /usr/sbin/mysqld
To check which interface or ip address mysqld process listen to we can use netstat command below. We’re looking for mysql default port 3306
sudo netstat -naptu | grep -m1 3306
tcp        0      0 127.0.0.1:3306          0.0.0.0:*               LISTEN      6301/mysqld
We can also use ss as alternative to netstat
ss -4n state listening | grep 3306
tcp    0      50                  127.0.0.1:3306                       *:*
By default MySQL will only listen to loopback address / localhost.
Securing MySQL Setup
Now let’s secure our MySQL server installation using mysql_secure_installation script.
Since we already set MySQL root password on installation we can enter MySQL root password that we already set.
mysql_secure_installation

NOTE: RUNNING ALL PARTS OF THIS SCRIPT IS RECOMMENDED FOR ALL MySQL
      SERVERS IN PRODUCTION USE!  PLEASE READ EACH STEP CAREFULLY!


In order to log into MySQL to secure it, we'll need the current
password for the root user.  If you've just installed MySQL, and
you haven't set the root password yet, the password will be blank,
so you should just press enter here.

Enter current password for root (enter for none):
Next step will be changing MySQL root password. We will skip this step.
OK, successfully used password, moving on...

Setting the root password ensures that nobody can log into the MySQL
root user without the proper authorisation.

You already have a root password set, so you can safely answer 'n'.

Change the root password? [Y/n] n
 ... skipping.
Now we will remove anonymous user from MySQL
By default, a MySQL installation has an anonymous user, allowing anyone
to log into MySQL without having to have a user account created for
them.  This is intended only for testing, and to make the installation
go a bit smoother.  You should remove them before moving into a
production environment.

Remove anonymous users? [Y/n] Y
 ... Success!
We will also disable remote access for MySQL root user
Normally, root should only be allowed to connect from 'localhost'.  This
ensures that someone cannot guess at the root password from the network.

Disallow root login remotely? [Y/n] Y
 ... Success!
Next step is removing test database and access to test database. Recent Ubuntu MySQL package doesn’t create MySQL test database but the access still available
By default, MySQL comes with a database named 'test' that anyone can
access.  This is also intended only for testing, and should be removed
before moving into a production environment.

Remove test database and access to it? [Y/n] Y
 - Dropping test database...
ERROR 1008 (HY000) at line 1: Can't drop database 'test'; database doesn't exist
 ... Failed!  Not critical, keep moving...
 - Removing privileges on test database...
 ... Success!
Last step for securing MySQL installation is reloading privilege table so all changes we made will be applied.
Reloading the privilege tables will ensure that all changes made so far
will take effect immediately.

Reload privilege tables now? [Y/n] Y
 ... Success!

Cleaning up...


All done!  If you've completed all of the above steps, your MySQL
installation should now be secure.

Thanks for using MySQL!
Now you have secure MySQL installation on Ubuntu 14.04 Trusty Tahr Server.
References
You can learn more about MySQL Server 5.5 from:
Summary
In this tutorial we learned how to install MySQL 5.5 on Ubuntu 14.04 Trusty Tahr. We also learned to manage MySQL service and also securing our MySQL server installation.