How to Install MySQL 8.0 on Ubuntu 16.04
Categories:
Overview
In this tutorial, we learn how to install MySQL 8.0 on Ubuntu 16.04 (Xenial Xerus) from MySQL apt repository.
MySQL 8.0 is the long-awaited release of MySQL that brings a lot of new features and enhancements.
Prerequisites
This tutorial assumes that we have a fresh installation of Ubuntu Server 16.04 (Xenial Xerus). You can also follow this tutorial on any flavor of Ubuntu 16.04, like Kubuntu or Xubuntu.
Please take extra caution when you’re following this tutorial on the production server that already serving production workload.
Install MySQL 8.0
Let’s start our process of installing MySQL 8.0 on ubuntu 16.04.
Update System
First of all, we will update our system to the latest update. Even though we have a fresh install of Ubuntu, there might be an update that is not applied to our system yet. We can use the command below to update our system.
<span class="token function">sudo</span> <span class="token function">apt-get</span> update
<span class="token function">sudo</span> <span class="token function">apt-get</span> upgrade
Add MySQL apt repository
MySQL developers provide a .deb package that we will create a new apt configuration for our systems.
Go to Download MySQL apt repository and click Download.
Find the link that says, “No thanks, just start my download,” right-click the link and copy link address. We use the link that we copied on the next step.
Now let’s download deb package that we just copy the link from MySQL download page.
$ <span class="token function">wget</span> -c https://dev.mysql.com/get/mysql-apt-config_0.8.10-1_all.deb
the -c option above means wget will continue the previous download file if it’s disconnected instead of creating a new file.
After downloading the file, we need to check the md5 checksum of the file. We use the MD5 checksum file to ensure the integrity of the file that we download.
md5sum mysql-apt-config_0.8.10-1_all.deb
5b36dd754e7752162f890206fae50931  mysql-apt-config_0.8.10-1_all.deb
Make sure the output above matches with the one listed on MySQL apt download page.
Install mysql-apt-config package using dpkg
<span class="token function">sudo</span> dpkg -i mysql-apt-config_0.8.10-1_all.deb
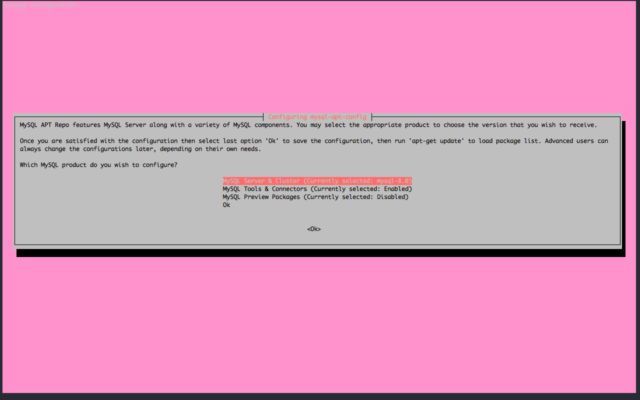
The installer will prompt several questions. The first one is which MySQL version that we want to use. We choose MySQL 8.0
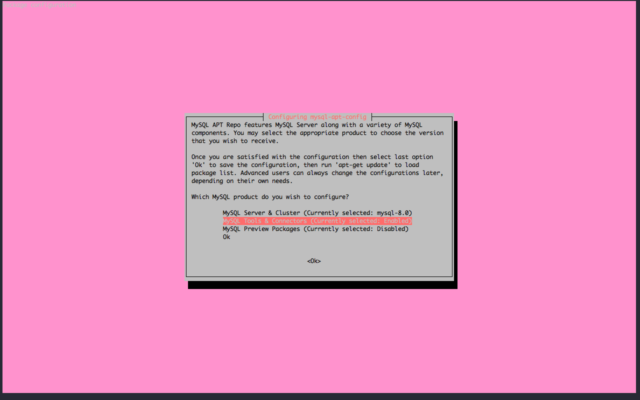
We enable MySQL tools and Connectors repository.
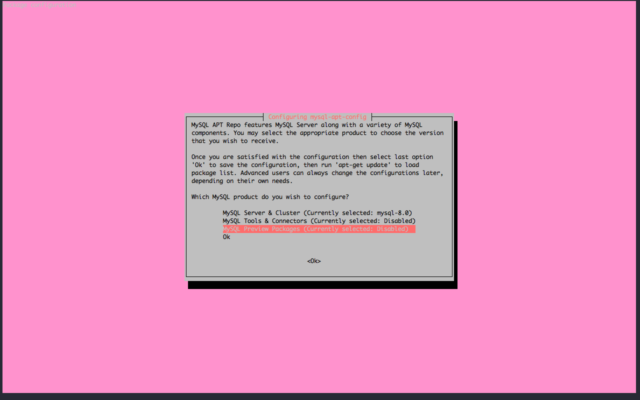
And we disable MySQL Preview Packages since we don’t need it
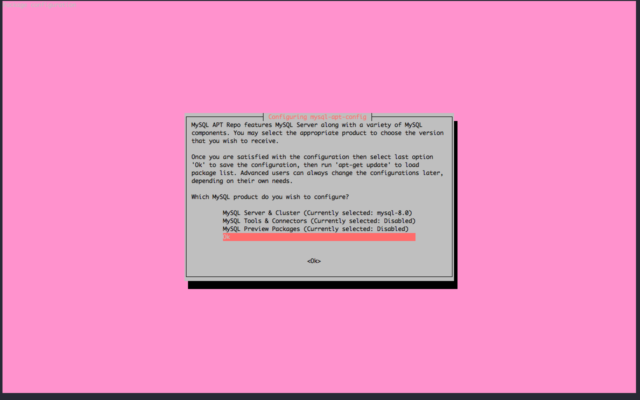
Choose OK and OK button to continue.
After MySQL repository configured we can remove the deb file since we already install the package and don’t need the .deb anymore.
<span class="token function">rm</span> -f mysql-apt-config_0.8.10-1_all.deb
Update apt metadata since we’re adding new repository
<span class="token function">sudo</span> <span class="token function">apt-get</span> update
Install MySQL Server 8.0 on Ubuntu 16.04
We can install MySQL Server 8.0 by installing mysql-server package. Since we already add MySQL apt repository this will be preferred instead of the mysql-server package from Ubuntu repository.
<span class="token function">sudo</span> <span class="token function">apt-get</span> <span class="token function">install</span> mysql-server
apt will list packages that will be installed. Press enter to continue the installation
Reading package lists<span class="token punctuation">..</span>. Done
Building dependency tree
Reading state information<span class="token punctuation">..</span>. Done
The following additional packages will be installed:
  libaio1 libmecab2 mecab-ipadic mecab-ipadic-utf8 mecab-utils mysql-client mysql-common mysql-community-client mysql-community-client-core mysql-community-server
  mysql-community-server-core
The following NEW packages will be installed:
  libaio1 libmecab2 mecab-ipadic mecab-ipadic-utf8 mecab-utils mysql-client mysql-common mysql-community-client mysql-community-client-core mysql-community-server
  mysql-community-server-core mysql-server
0 upgraded, 12 newly installed, 0 to remove and 32 not upgraded.
Need to get 49.2 MB of archives.
After this operation, 403 MB of additional disk space will be used.
Do you want to continue? <span class="token punctuation">[</span>Y/n<span class="token punctuation">]</span>
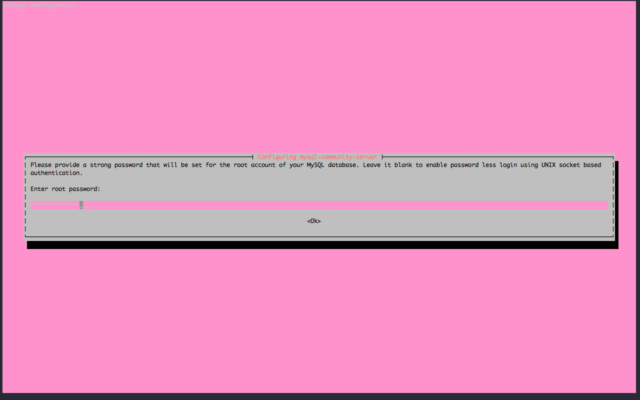
Enter the MySQL root password. Please note MySQL root user and system root user is two different users and not related.
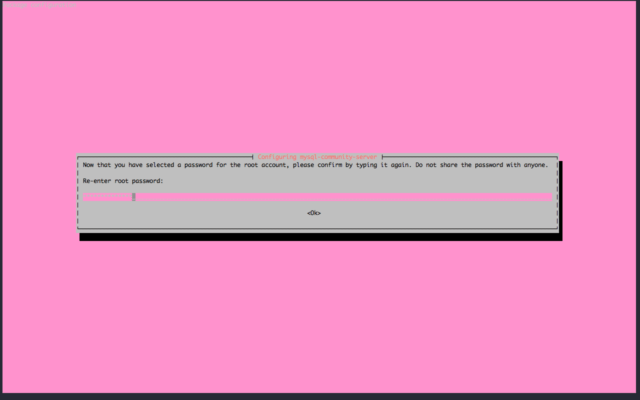
Re-enter root password
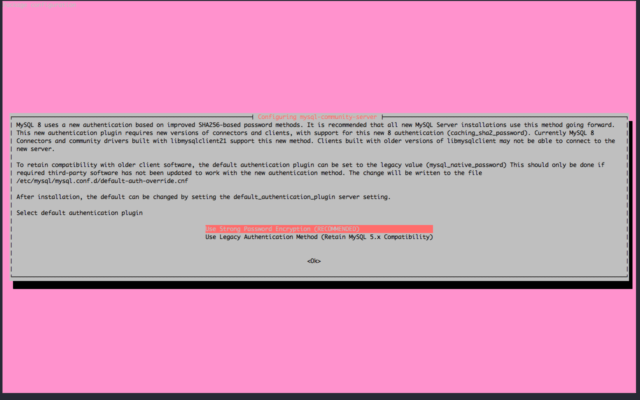
MySQL 8.0 introduces new strong password encryption. If you don’t need backward compatibility with MySQL 5.x choose Use Strong Password Encryption (RECOMMENDED)
MySQL installer will do the rest of the installation process.
Check MySQL 8.0 Service on Ubuntu 16.04
To check the MySQL service, we can use the service command.
<span class="token function">sudo</span> <span class="token function">service</span> mysql status
It will give output similar to below if MySQL Server is running
● mysql.service - MySQL Community Server
  Loaded: loaded <span class="token punctuation">(</span>/lib/systemd/system/mysql.service<span class="token punctuation">;</span> enabled<span class="token punctuation">;</span> vendor preset: enabled<span class="token punctuation">)</span>
  Active: active <span class="token punctuation">(</span>running<span class="token punctuation">)</span> since Sun 2018-07-08 07:30:00 UTC<span class="token punctuation">;</span> 13s ago
    Docs: man:mysqld<span class="token punctuation">(</span>8<span class="token punctuation">)</span>
          http://dev.mysql.com/doc/refman/en/using-systemd.html
Main PID: 3506 <span class="token punctuation">(</span>mysqld<span class="token punctuation">)</span>
  Status: <span class="token string">"SERVER_OPERATING"</span>
  CGroup: /system.slice/mysql.service
          └─3506 /usr/sbin/mysqld

Jul 08 07:29:59 ubuntu-xenial systemd<span class="token punctuation">[</span>1<span class="token punctuation">]</span>: Starting MySQL Community Server<span class="token punctuation">..</span>.
Jul 08 07:30:00 ubuntu-xenial systemd<span class="token punctuation">[</span>1<span class="token punctuation">]</span>: Started MySQL Community Server.
We can also use systemctl commands to check service since we’re running Ubuntu 16.04
<span class="token function">sudo</span> systemctl status mysql.service
Check MySQL Server 8.0 Listen Port
We can check which port MySQL listen using netstat or ss command.
To check with netstat we can use the command below
$ <span class="token function">sudo</span> <span class="token function">netstat</span> -napt <span class="token operator">|</span> <span class="token function">grep</span> mysql
tcp6       0      0 :::3306                 :::*                    LISTEN      3506/mysqld
tcp6       0      0 :::33060                :::*                    LISTEN      3506/mysqld
To check with ss we can use the command below
$ <span class="token function">sudo</span> ss -ltn -p <span class="token operator">|</span> <span class="token function">grep</span> mysql
LISTEN     0      128         :::3306                    :::*                   users:<span class="token punctuation">((</span><span class="token string">"mysqld"</span>,pid<span class="token operator">=</span>3506,fd<span class="token operator">=</span>20<span class="token punctuation">))</span>
LISTEN     0      70          :::33060                   :::*                   users:<span class="token punctuation">((</span><span class="token string">"mysqld"</span>,pid<span class="token operator">=</span>3506,fd<span class="token operator">=</span>23<span class="token punctuation">))</span>
Both outputs above provide a similar output that MySQL listen on both port 3306 and 33060.
Port 3306 is MySQL port, while port 33060 is MySQL extended protocol. It will listen when X plugin enabled and in MySQL 8.0 this plugin is enabled by default.
Securing MySQL 8.0 Installation
Before we start using MySQL installation let’s secure MySQL installation. MySQL shipped with a utility named mysql_secure_installation
$ mysql_secure_installation
Input root password that we already set on installation.
Securing the MySQL server deployment.

Enter password <span class="token keyword">for</span> user root:
MySQL has a plugin to validate a password that will check password strength. Press y
VALIDATE PASSWORD PLUGIN can be used to <span class="token function">test</span> passwords
and improve security. It checks the strength of password
and allows the <span class="token function">users</span> to <span class="token keyword">set</span> only those passwords <span class="token function">which</span> are
secure enough. Would you like to setup VALIDATE PASSWORD plugin?

Press y<span class="token operator">|</span>Y <span class="token keyword">for</span> Yes, any other key <span class="token keyword">for</span> No: y
Choose 2 for the level of password validation policy and press choose N on changing root password since want to keep the current root password.
There are three levels of password validation policy:

LOW    Length <span class="token operator">>=</span> 8
MEDIUM Length <span class="token operator">>=</span> 8, numeric, mixed case, and special characters
STRONG Length <span class="token operator">>=</span> 8, numeric, mixed case, special characters and dictionary                  <span class="token function">file</span>

Please enter 0 <span class="token operator">=</span> LOW, 1 <span class="token operator">=</span> MEDIUM and 2 <span class="token operator">=</span> STRONG: 2
Using existing password <span class="token keyword">for</span> root.

Estimated strength of the password: 100
Change the password <span class="token keyword">for</span> root? <span class="token punctuation">((</span>Press y<span class="token operator">|</span>Y <span class="token keyword">for</span> Yes, any other key <span class="token keyword">for</span> No<span class="token punctuation">)</span>: N

 <span class="token punctuation">..</span>. skipping.
To remove anonymous user press y.
By default, a MySQL installation has an anonymous user,
allowing anyone to log into MySQL without having to have
a user account created <span class="token keyword">for</span> them. This is intended only <span class="token keyword">for</span>
testing, and to <span class="token function">make</span> the installation go a bit smoother.
You should remove them before moving into a production
environment.

Remove anonymous users? <span class="token punctuation">(</span>Press y<span class="token operator">|</span>Y <span class="token keyword">for</span> Yes, any other key <span class="token keyword">for</span> No<span class="token punctuation">)</span> <span class="token keyword">:</span> y
Success.
Enter y to disallow root user to login remotely.
Usually, root should only be allowed to connect from
<span class="token string">'localhost.'</span> This practice ensures that someone cannot guess at the root password from the network.

Disallow root login remotely? <span class="token punctuation">(</span>Press y<span class="token operator">|</span>Y <span class="token keyword">for</span> Yes, any other key <span class="token keyword">for</span> No<span class="token punctuation">)</span> <span class="token keyword">:</span> y
Success.
Press y to remove default test database
By default, MySQL comes with a database named <span class="token string">'test'</span> that anyone can access. This database is also intended only <span class="token keyword">for</span> testing and should be removed before moving into a production
environment.


Remove <span class="token function">test</span> database and access to it? <span class="token punctuation">(</span>Press y<span class="token operator">|</span>Y <span class="token keyword">for</span> Yes, any other key <span class="token keyword">for</span> No<span class="token punctuation">)</span> <span class="token keyword">:</span> y
 - Dropping <span class="token function">test</span> database<span class="token punctuation">..</span>.
Success.

 - Removing privileges on <span class="token function">test</span> database<span class="token punctuation">..</span>.
Success.
Enter y to reload privilege table.
Reloading the privilege tables will ensure that all changes
made so far will take effect immediately.

Reload privilege tables now? <span class="token punctuation">(</span>Press y<span class="token operator">|</span>Y <span class="token keyword">for</span> Yes, any other key <span class="token keyword">for</span> No<span class="token punctuation">)</span> <span class="token keyword">:</span> y
Success.

All done<span class="token operator">!</span>
Now our MySQL installation secured.
Testing access to MySQL 8.0
Now let’s test access to MySQL using MySQL client.
mysql -u root -p
Enter password:
Welcome to the MySQL monitor.  Commands end with <span class="token punctuation">;</span> or \g.
Your MySQL connection <span class="token function">id</span> is 14
Server version: 8.0.11 MySQL Community Server - GPL

Copyright <span class="token punctuation">(</span>c<span class="token punctuation">)</span> 2000, 2018, Oracle and/or its affiliates. All rights reserved.

Oracle is a registered trademark of Oracle Corporation and/or its
affiliates. Other names may be trademarks of their respective
owners.

Type <span class="token string">'help;'</span> or <span class="token string">'\h'</span> <span class="token keyword">for</span> help. Type <span class="token string">'\c'</span> to <span class="token function">clear</span> the current input statement.

mysql<span class="token operator">></span>
To quit from MySQL client you can type quit
We can also test access to MySQL database using mysqladmin.
Let’s give ping command to MySQL
$ mysqladmin -u root -p <span class="token function">ping</span>
Enter password:
mysqld is alive
The output above shows that MySQL is running
Now let’s check MySQL version
$ mysqladmin -u root -p version
Enter password:
mysqladmin  Ver 8.0.11 <span class="token keyword">for</span> Linux on x86_64 <span class="token punctuation">(</span>MySQL Community Server - GPL<span class="token punctuation">)</span>
Copyright <span class="token punctuation">(</span>c<span class="token punctuation">)</span> 2000, 2018, Oracle and/or its affiliates. All rights reserved.

Oracle is a registered trademark of Oracle Corporation and/or its
affiliates. Other names may be trademarks of their respective
owners.

Server version      8.0.11
Protocol version    10
Connection      Localhost via UNIX socket
UNIX socket     /var/run/mysqld/mysqld.sock
Uptime:         36 min 30 sec

Threads: 2  Questions: 10  Slow queries: 0  Opens: 110  Flush tables: 2  Open tables: 86  Queries per second avg: 0.004
References
Several references that you can read to learn more about MySQL 8.0:
Summary
In this tutorial, we learn how to install MySQL 8.0 on Ubuntu 16.04 from MySQL official apt repository.
We also learn securing our MySQL installation by running mysql_secure_installation script.
We test accessing MySQL using mysql client and mysqladmin.
If you find this tutorial useful, please leave a comment below.
Correction, suggestions, and requests additional details to be added to this tutorial are welcome. Until next time!

